This function allows the import and export of metadata. Why would we want to do this?
Let's see the main reasons:
- You want to analyse the metadata on your own computer
- You want to upload some new metadata connected to one of your sessions
- You want to change some metadata connected to one of your sessions
To export and import metadata, follow the steps below.
- Login and choose the corresponding project, then go to 'My Data' and click on 'Other Options'. Select 'Export Metadata'.
 Here, you can extract up to 3 different header rows: title, type and ID. These rows can be organized, for example, as Gender, Handedness, Gray Matter volume or any other metadata field included in the project.
 - Afterwards, click on the 'Prepare CSV file' button. A file named "subject_data.csv" will be downloaded to your computer. If you chose to include all 3 header rows, your CSV file will contain 4 rows: type, ID, title and the data itself. The columns are secret_name, age_at_scan, and in this particular example, gender and handedness.
secret_name is the subject ID/session ID. In the example below that is: sub1/1
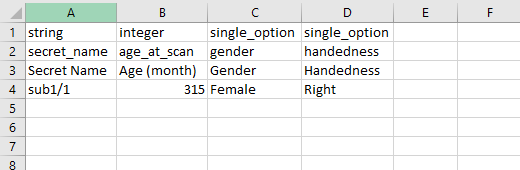
It is really important to know for each subject which session ID you want to upload or modify. To create a new metadata subject or to create a new Session in an existing subject, use the following format: 'subjectname/sessionID'.
Be aware that the import of new metadata will overwrite the old one of the same name. Old metadata are accessible from the history but the system will use the new imported metadata.
- To import a CSV file from your computer, please do as before by clicking 'Other options'. Now, select 'Import Metadata'.
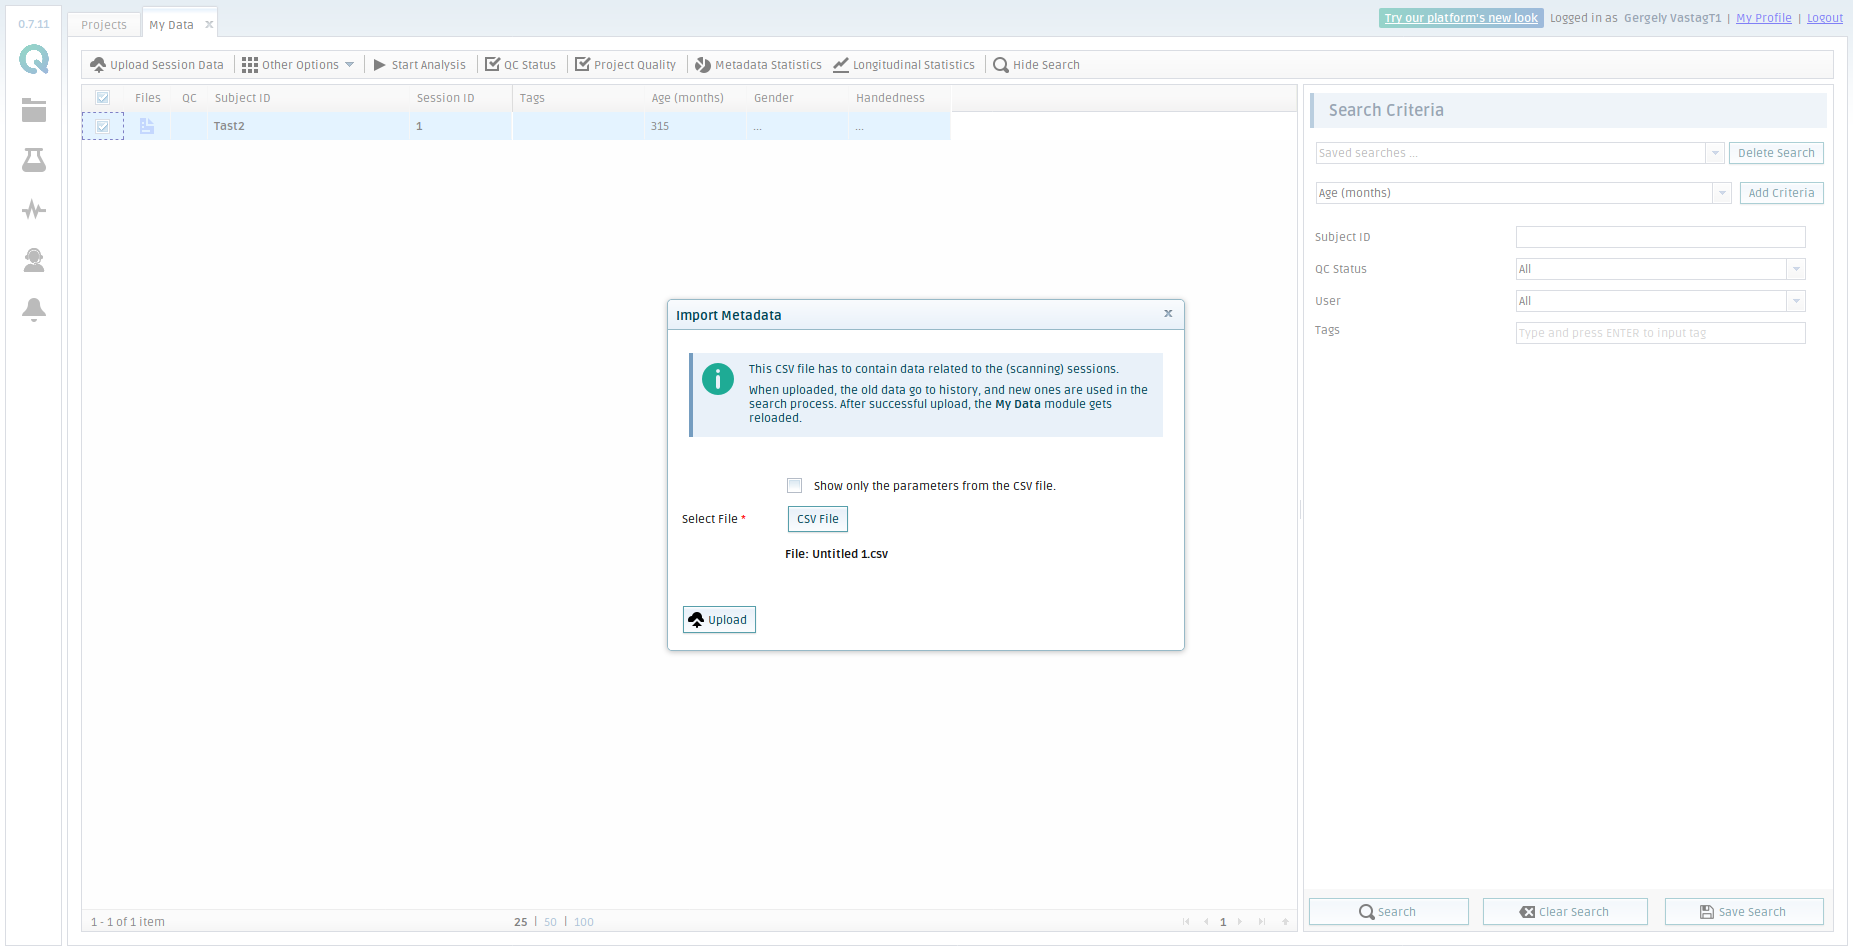
- For the import, please note that only the ID header row is needed and required. It is important to double check the format before the upload, to make sure everything is correct. Below is an example of an import CSV file opened in a spreadsheet and in a text editor. In this case only 1 row of metadata will be imported.


- After the upload of the CSV file of the new metadata, you will be able to see the changes in the summarizing table under 'My Data' or the new metadata line with the new Session ID or the new Subject ID depending on your changes.
Note: It doesn't matter whether you select an existing Session or not, because the uploading is driven by the above-mentioned Subject and Session ID.
There is another option called 'Show only the parameters from the CSV file'. This option could be useful to recompose the appearance of the table of your metadata. It doesn't mean that the metadata will be deleted, i.e. old columns from the dataset. This recomposition will just modify the appearance with which you can see much more easily what kind of datasets you have.
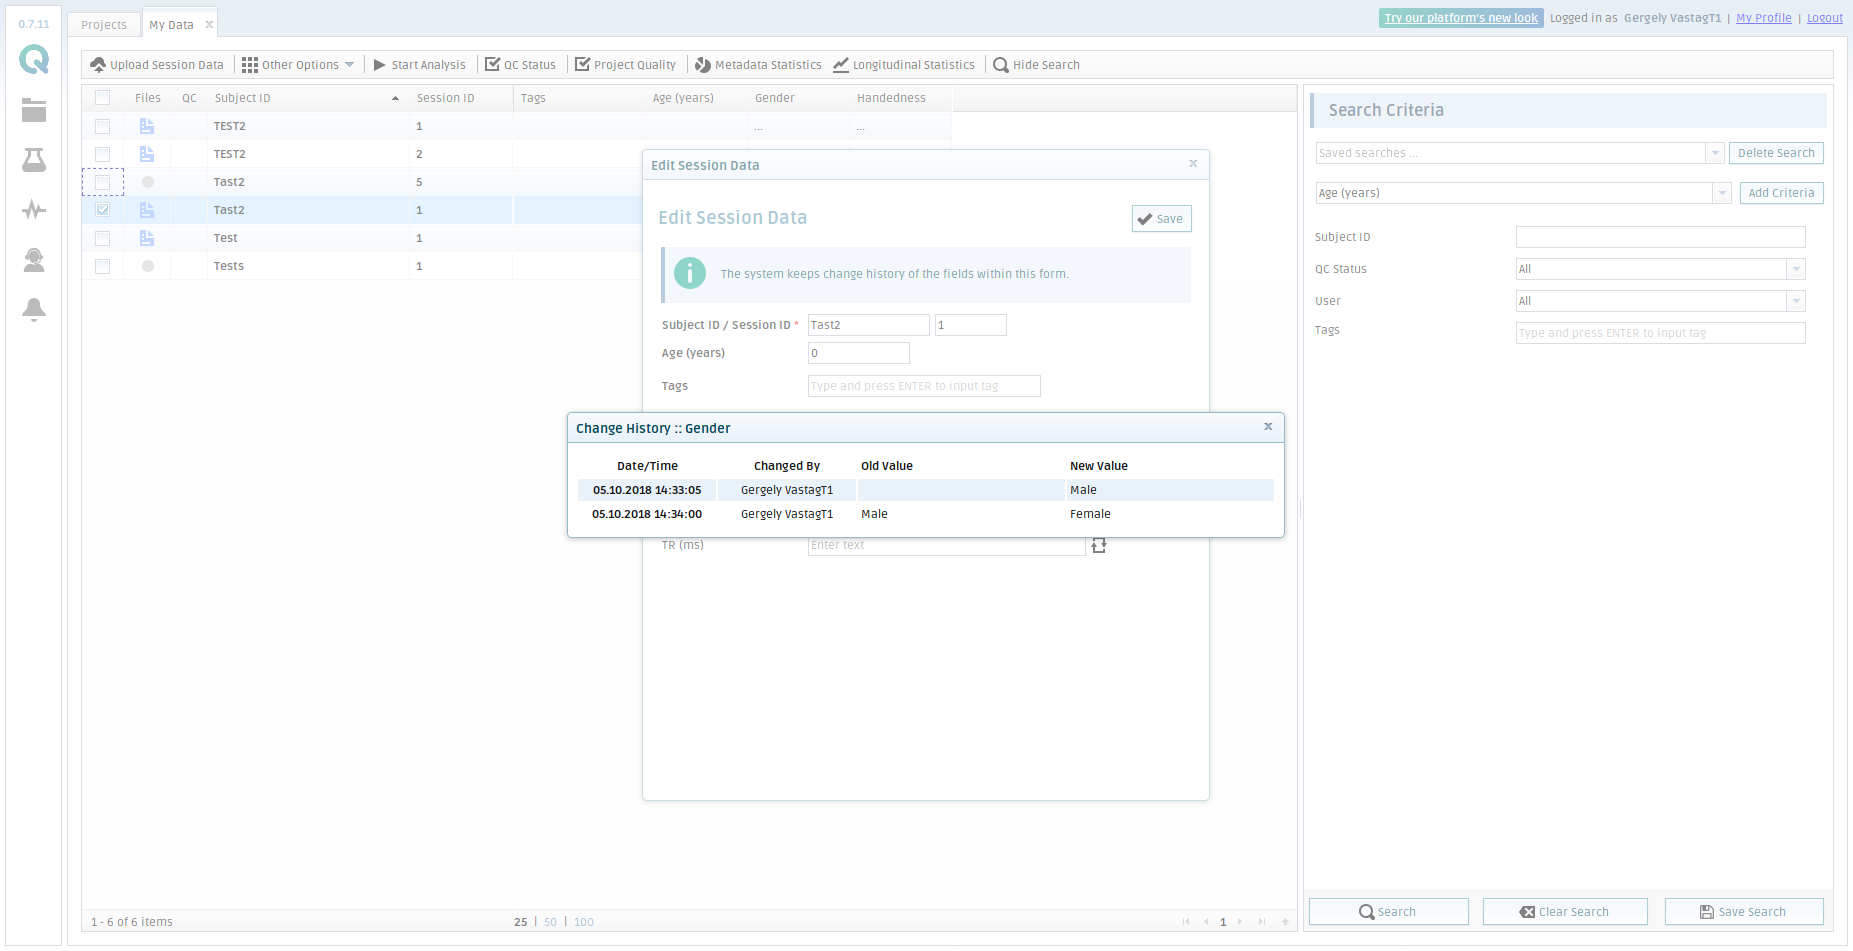
Where can you check what the old value of the metadata was?
In the case of overwriting a data by importing, the data can still be checked from which value you changed the dataset. To do so, follow the following steps:
- Select the session which had been changed.
- Click on 'Other Options', select 'Edit session'.
- If you click on the double square arrow icon, the popup will tell you what kind of changes were made by whom and when.
Create free account now!